Stirling progress pics

Collapse
X
 
  • Filter
  • Time
  • Show
Clear All
new posts
  • S_J_H
    Senior Member
    • Mar 2006
    • 1182

    Stirling progress pics

    I have been lurking here for a while not doing much posting as I read and used the search button and sort of got to know the board.
    I have only been into Home machining a couple of years but was always into metal and fab work. This must be the most addictive hobby I have ever had!

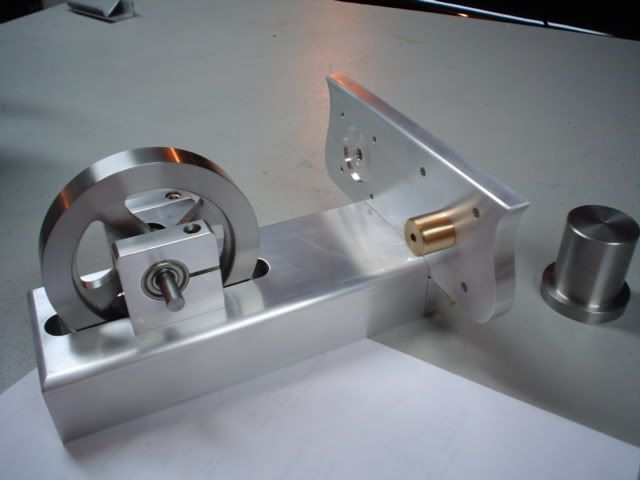
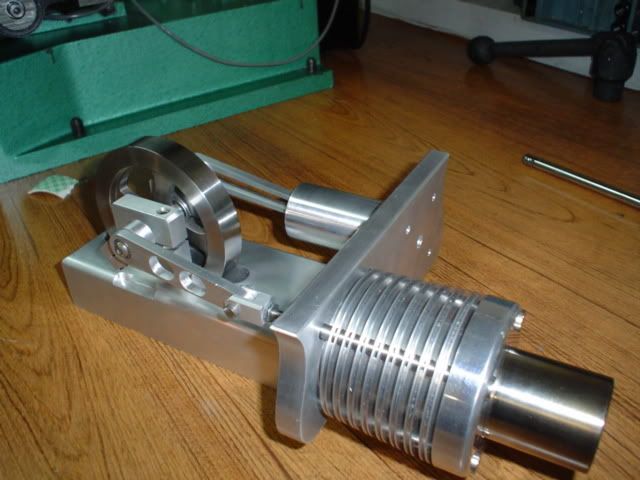
    I decided to build the Stirling engine featured in HSM DEC/05 after building the Crusader .60 which ran like crap(not enough compression),
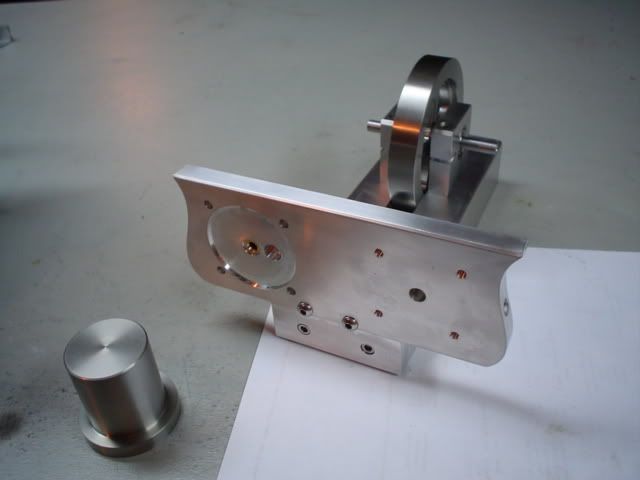
    I am using the plans as a guideline and just sort of having fun giving it a different look.
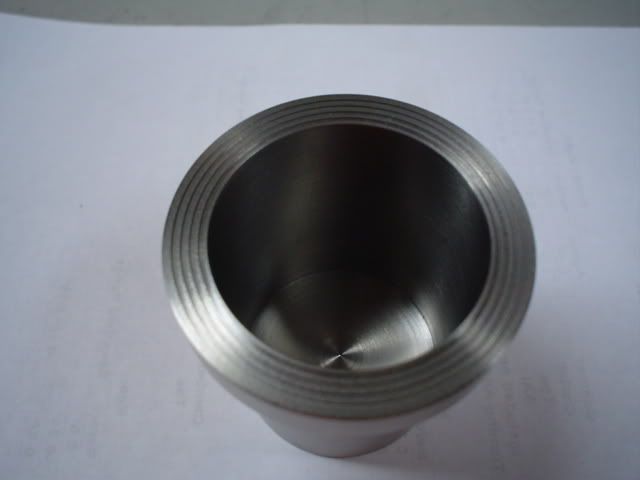
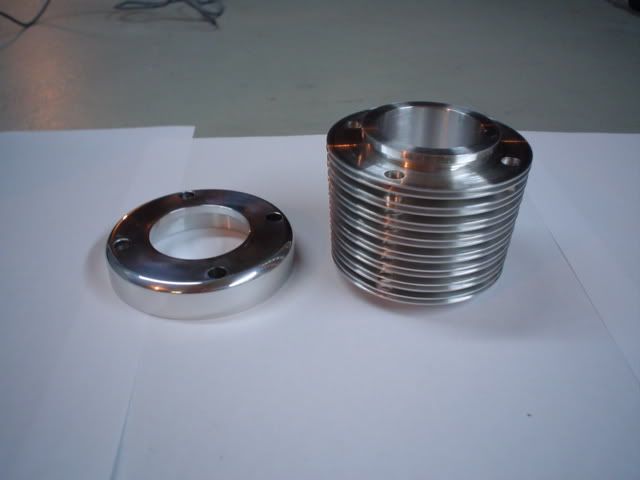
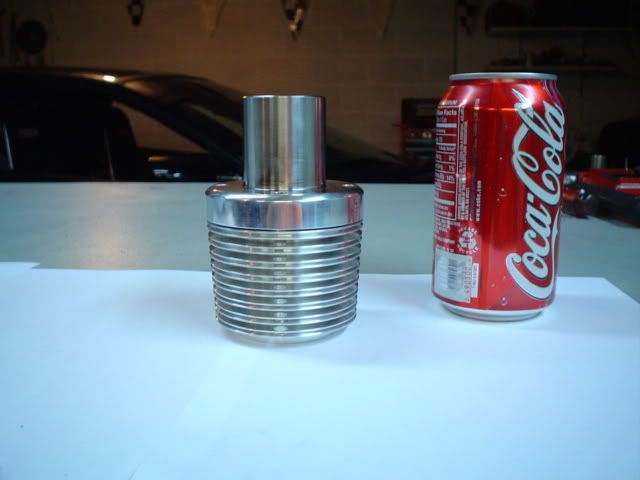
    The flywheel is stainless and so is the hot cap. I must say turning the stainless hot cap and flywheel in my little 9x20 import lathe was a challenge but I think they turned out pretty well.I grooved the hot cap flange surface to restrict the heat path area a bit. No idea if it will help but will help the gasket to seal at least.Or if nothing else I got to make some little grooves for fun.
    I'll probably tackle the cold end this weekend.


    Steve
  • Evan
    Senior Member
    • May 2003
    • 41977

    #2
    Nice, very shiny. I like shiny things.
    Free software for calculating bolt circles and similar: Click Here

    Comment

    • Mcgyver
      Senior Member
      • Mar 2005
      • 13411

      #3
      very neat work - looks good. what type of ss did you use, something freecutting like 303? it takes a little more to cut than free cutting mild steel, but in in the years to come you'll be so happy with the absence of rust! next engine i start I'm thinking all the bright parts will be in stainless
      located in Toronto Ontario

      Comment

      • S_J_H
        Senior Member
        • Mar 2006
        • 1182

        #4
        shiny is good.. WAVY chatter bad.. Very bad.

        I just opened a photobucket account and felt the need to take a few pics of something.
        Steve

        Comment

        • S_J_H
          Senior Member
          • Mar 2006
          • 1182

          #5
          very neat work - looks good. what type of ss did you use, something freecutting like 303?
          Thanks,
          yes it is 303. I have done little parts with stainless but this was my first time doing anything of this size removing this much stock in this material.
          I quickly learned about work hardening while making these parts.
          I used ccmt inserts for turning and a solid carbide boring bar and end mill for all the machining. Kept it nice and cool using my fogbuster system.
          I have my little 9x20 lathe setup with the compound slide removed using a solid tool rest where I can easily cut .125" deep per pass in 12l14 or aluminum, but the 303 stainless I was limited to about .030" for roughing so it took a while to make these. It was not that the lathe would chatter with heavier cuts, the belt would slip.

          Steve

          Comment

          • japcas
            Senior Member
            • Nov 2004
            • 1149

            #6
            Looks Good!

            That looks real good S J H. Keep up the good work and be sure to keep us up to date on your progress by posting more pictures as you get more parts finished. I like these kind of posts a lot, always keeps you wondering what is coming next.
            Jonathan P.

            Comment

            • jkilroy
              Senior Member
              • Oct 2001
              • 1494

              #7
              Very nice work, please keep up the postings

              Great job, very nice work. I love the 303 myself, just make sure you are cutting and not rubbing.
              James Kilroy

              Comment


              • #8
                As those darn things are so finicky, I will reserve judgment till I see if it runs.

                It is shinny though.

                Comment

                • Wareagle
                  Senior Member
                  • Nov 2005
                  • 241

                  #9
                  Very nice looking work! Keep us posted on the progress.
                  Why buy it for $2 when you can make it for $20

                  Comment

                  • S_J_H
                    Senior Member
                    • Mar 2006
                    • 1182

                    #10
                    Thanks guys. I'll post update pics.
                    Steve

                    Comment

                    • JIMofalltrades031
                      Senior Member
                      • Sep 2004
                      • 168

                      #11
                      Nice work. I like to see that you changed it around a little for your own tastes. Good pics too.
                      Jim, By the river enjoying life...

                      Comment

                      • S_J_H
                        Senior Member
                        • Mar 2006
                        • 1182

                        #12
                        I finished up the cold end and hot cap retainer. I had a few issues making a decent grooving cutting bit for the fins which I talked about in this very good thread near the end.

                        These fins are .125" spaced apart and I did not want to mess with multiple cuts for the main fins so I split the cutting tip which let my little under powered 9x20 lathe cut a full .125" groove x .6" deep on the 3" od stock fairly easy.
                        Gave it a cone shape and double cut the fins for a little extra cooling area, but mainly because it looks sort of neat.

                        Steve

                        Comment

                        • Evan
                          Senior Member
                          • May 2003
                          • 41977

                          #13
                          Nice to see that someone else enjoys polishing as much as I do.

                          I too am looking forward to seeing it run.
                          Free software for calculating bolt circles and similar: Click Here

                          Comment

                          • S_J_H
                            Senior Member
                            • Mar 2006
                            • 1182

                            #14
                            I too am looking forward to seeing it run.
                            huh? you mean these crazy looking things are supposed to run?

                            Steve

                            Comment

                            • S_J_H
                              Senior Member
                              • Mar 2006
                              • 1182

                              #15
                              This project was put on hold for a long time. I just recently started to finish it up and have 1 part left to make, the Power cyl retainer. But I was curious to see it run so I ran it with no retainer, just sealer holding the power cyl in place.
                              It started instantly and looks like it has very good rpm!
                              Pretty neat for me as this was my first time seeing a stirling engine run.


                              And here is a clip showing it running. Not the best quality but it does show it running quite well.

                              Steve

                              Comment

                              Working...
                              X