.png)

 Tweet
Tweet
I built a tig pedal several years ago for my first tig welder, and DC only inverter tig, miller CST250. The pedal used a 15 ohm pot and some very simple linkage.
I traded the CST to a buddy for a older Dialarc 250 AC/DC power source. I promptly hooked up my homemade tig pedal to it and caught it on fire. Turns out the dialarc uses something called a mag amp drive to set the welding current. I have no idea how it works, but a portion of the welding current is actually passed through the controls to set the output. Turns out that up to 35 amps can pass through the controls. No wonder a 10 watt pot caught fire.
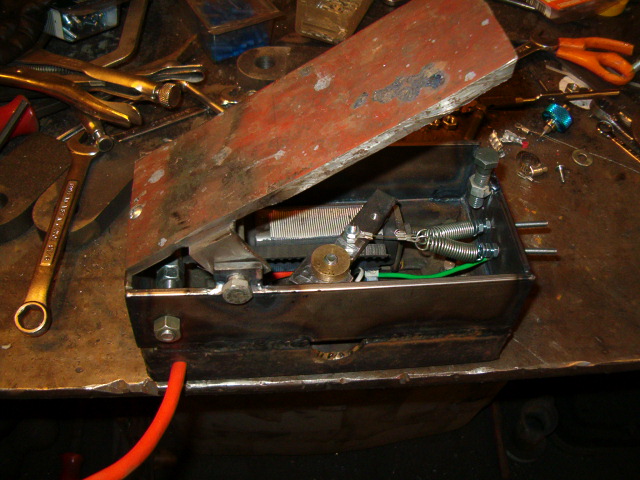
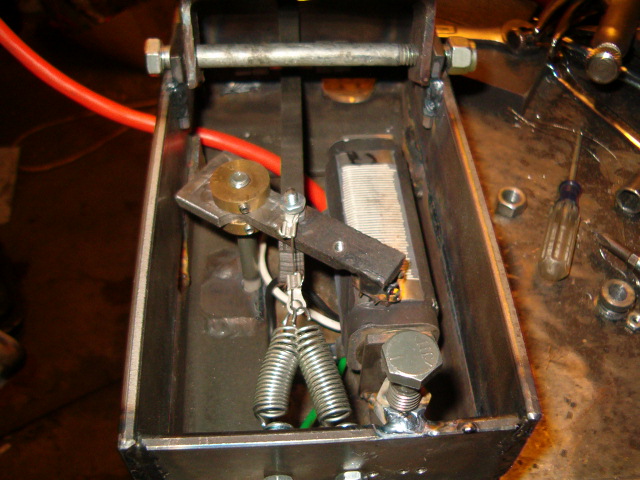
The miller pedal for the dialarc is nearly $400, so I figured I would build a new one. I ordered the wire wound variable resistor used in the pedal for my machine for about $20. I used the frame from my old pedal, but extended it a few inches to house the larger ceramic power resistor. The brush came from an old motor. I made the rest of the parts. It is pretty simple. I used two springs from home depot to provide tension and some stainless steel fishing wire for the linkage. The stainless wire proved to not be tough enough this time around, so the main connection between the pedal and the brush arm is now a piece of timing belt from my belt sander project.
Here are the pictures:
Later,
Jason
I traded the CST to a buddy for a older Dialarc 250 AC/DC power source. I promptly hooked up my homemade tig pedal to it and caught it on fire. Turns out the dialarc uses something called a mag amp drive to set the welding current. I have no idea how it works, but a portion of the welding current is actually passed through the controls to set the output. Turns out that up to 35 amps can pass through the controls. No wonder a 10 watt pot caught fire.
The miller pedal for the dialarc is nearly $400, so I figured I would build a new one. I ordered the wire wound variable resistor used in the pedal for my machine for about $20. I used the frame from my old pedal, but extended it a few inches to house the larger ceramic power resistor. The brush came from an old motor. I made the rest of the parts. It is pretty simple. I used two springs from home depot to provide tension and some stainless steel fishing wire for the linkage. The stainless wire proved to not be tough enough this time around, so the main connection between the pedal and the brush arm is now a piece of timing belt from my belt sander project.
Here are the pictures:
Later,
Jason

Comment