Flatness criteria for surface plates.

Collapse
X
 
  • Filter
  • Time
  • Show
Clear All
new posts
  • Forrest Addy
    Senior Member
    • Oct 2002
    • 5792

    Flatness criteria for surface plates.

    Someone was asking what the flatness tolerance for the different grades of surface plates.

    Here's the flatness tolerance formula:

    • Laboratory Grade AA: (40 + diagonal [in inches] of surface plate squared / 25) x 0.000001 inches.
    • Inspection Grade A: Laboratory Grade AA x 2
    • Inspection Grade B: Laboratory Grade AA x 4

    Source: http://www.mahr.com/index.php?NodeID...Language=EN-US
  • oldtiffie
    Member
    • Nov 1999
    • 3963

    #2
    Not a worry

    These further informations may assist:


    Don't get "thrown" by millionths of an inch as there are 100 of them in a "tenth" (0.0001") and 1,000 of them in a "thou" (0.001").

    These "small" numbers can be just as over-awing as the large number of digits after the decimal point on a calculator. If working in "inches", its rarely that you'd need to go past the fourth significant figure after the decimal point - ie 0.0001" or 6.1234" as most times the third significant figure - ie 0.001" or 6.123" is quite adequate.

    Working in millimetres (mm) and micrometers (1,000 per mm) is similar. The normal significant figure after the decimal point is two - ie 0.01mm (~0.0004") or if "finer" use 3 significant figures - ie 0.001mm (~0.00004").

    To use the formula:

    Laboratory Grade AA = (40 + diagonal squared/25) x .000001" (unilateral)
    Inspection Grade A = Laboratory Grade AA x 2
    Tool Room Grade B = Laboratory Grade AA x 4.

    The AA plate accuracy over say 4" is:

    (40 + (4^2/25)) X 0.000001"

    = (40 + 16/25) X 0.000001"

    = (40 + 0.64) X 0.000001"

    = 40.64 X 0.000001"

    or approximately 0.00004" per 4"

    and for a Grade A plate it is 2 X 0.00004 = 0.00008" per 4"

    and for a Grade B plate it is 4 X 0.00004 + 0.00016" per 4"

    So the "Grade B" plates that are readily available are pretty good and should be more than adequate for Tool Rooms and most HSM and "Pro" shops.

    Comment

    • Your Old Dog
      Senior Member
      • Dec 2004
      • 7269

      #3
      My 12x18 from Enco at $25.00 and free shipping must have been the much sought after patio grade.
      - - - - - - - - - - - - - - - - - - - - - - - - - - - - - - - -
      Thank you to our families of soldiers, many of whom have given so much more then the rest of us for the Freedom we enjoy.

      It is true, there is nothing free about freedom, don't be so quick to give it away.

      Comment

      • oldtiffie
        Member
        • Nov 1999
        • 3963

        #4
        Grade B

        Don't think so YOD.

        I'd bet it would be Grade B - Tool-Room.

        Goes hand in glove with Grade B slip guages (aka "Jo Blocks").

        Comment

        • loose nut
          Senior Member
          • Sep 2006
          • 6465

          #5
          Still better then a piece of plate glass and probably cheaper.
          The shortest distance between two points is a circle of infinite diameter.

          Bluewater Model Engineering Society at https://sites.google.com/site/bluewatermes/

          Southwestern Ontario. Canada

          Comment

          • DICKEYBIRD
            Senior Member
            • Apr 2004
            • 3716

            #6
            Originally posted by Your Old Dog
            My 12x18 from Enco at $25.00 and free shipping must have been the much sought after patio grade.
            LOL Dangit! You made me blow a swig of adult bevarage all over my monitor with that one.
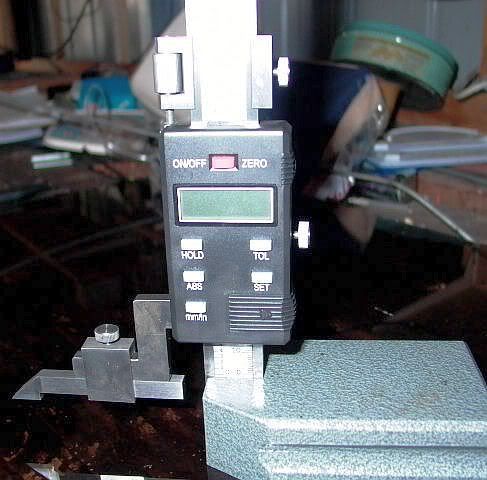
            I just got the same one from Enco as well. I never thought about it being 3" thick and over 70 lbs. Quite a lump to move around! I think they're a bit better than "patio grade" though. Plenty good for my needs.
            Milton

            "Accuracy is the sum total of your compensating mistakes."

            "The thing I hate about an argument is that it always interrupts a discussion." G. K. Chesterton

            Comment

            • oldtiffie
              Member
              • Nov 1999
              • 3963

              #7
              "Surface plates"

              Originally posted by loose nut
              Still better then a piece of plate glass and probably cheaper.
              Probably so.

              I use ground float glass as thick as I can get it from my friendly local Glazier - straight from his scrap pile -and the thicker the better. He cuts it as required and grinds all faces and "breaks" all edges (arrases) or bevels them as required just for beer money.

              He says that a lot of local people (motor cycles etc.) who need to "do up" a cylinder head will use it as a lap with "wet and dry" emery paper. Some small home and jobbing shops use it for setting out or setting up.

              I use it to set up as a surface plate.

              Its much easier to handle and store than a surface plate - mine lives on it edge on the floor at the side of my bench.

              Here is mine. I have not attempted to measure it to the n^th degree but it is more than adequate for any job I've used it for. Other than that I use the top face of one of my magnetic chucks or the top face of my universal grinder - and the table of my mills.


              Granite surface plates have been generally unobtainable at pretty well any cost let alone cheaply in OZ until fairly lately. These are all I've seen - although I haven't looked too hard for one lately. An accuracy of 6 micrometres (~ 240 millions of an inch ~ 0.000024 ~ 1/4 of a "tenth" is pretty good.

              Comment

              • Thomas Staubo
                Senior Member
                • Jun 2007
                • 413

                #8
                How thick are your glass plate Tiffie? (in mm)


                .
                Thomas

                Problems worthy of attack prove their worth by hitting back
                - Piet Hein

                Comment

                • darryl
                  Senior Member
                  • Jan 2003
                  • 14429

                  #9
                  Patio grade, ha ha. For some time I had been using the ATVB grade- a valve body from an automatic tranny. I built a wooden box, then put a layer of concrete in the bottom, set the valve body into that, then filled in with concrete. The milled surface of the valve body sits higher than the concrete so I ended up with a 'flat' that's full of tapped holes to mount stuff to.

                  Now that I have an actual granite surface plate I should probably check the flatness of that old one. I found it most useful when assembling housings etc that needed to be accurately bolted together without twist, and for fixing sandpaper to when needing somenting sanded perfectly flat.

                  I actually built two of them. Just today I used them both, but not for the intended purpose. They're holding down some rubber belting material. I'm hoping I can get most of the warpage out of them so I can use them in front of the machines as mats.
                  I seldom do anything within the scope of logical reason and calculated cost/benefit, etc- I'm following my passion-

                  Comment

                  • oldtiffie
                    Member
                    • Nov 1999
                    • 3963

                    #10
                    Plate thickness.

                    Thomas.

                    The glass must be "float" (and not "drawn") glass. Float is the "norm" now anyway. Get it as thick as is reasonable at the time - for obvious reasons

                    The piece shown is 12mm thick. I have another smaller bit that is 10mm thick that I use on the mill table. I will post a pic or so later.

                    I will also address some "issues" about the use of a surface plate in a HSM shop.

                    Comment

                    • lane
                      Senior Member
                      • Aug 2005
                      • 2691

                      #11
                      Heck I just use my mill table. Like a old boss used to say. It`s as flat as piss on a plate.
                      Every Mans Work Is A Portrait of Him Self
                      http://sites.google.com/site/machinistsite/TWO-BUDDIES
                      http://s178.photobucket.com/user/lan...?sort=3&page=1

                      Comment

                      • oldtiffie
                        Member
                        • Nov 1999
                        • 3963

                        #12
                        Lane got it in one

                        Yep - I agree with you Lane as many times there is a lot of undue concern about and reverence toward the common shop surface plate. Same applies to digital and vernier height guages. And too little to the common surface guage and Machinist's (6" and 12") rules.

                        And all too often with no justification other than someone - or a lot of someones - said so.

                        Following on from my previous post to Thomas Staubo, I thought I'd provide the glass "surface plate" sizes:
                        - 12mm: 600 X 600mm;
                        - 10mm" 600 X 300mm.

                        And some pics and comments:

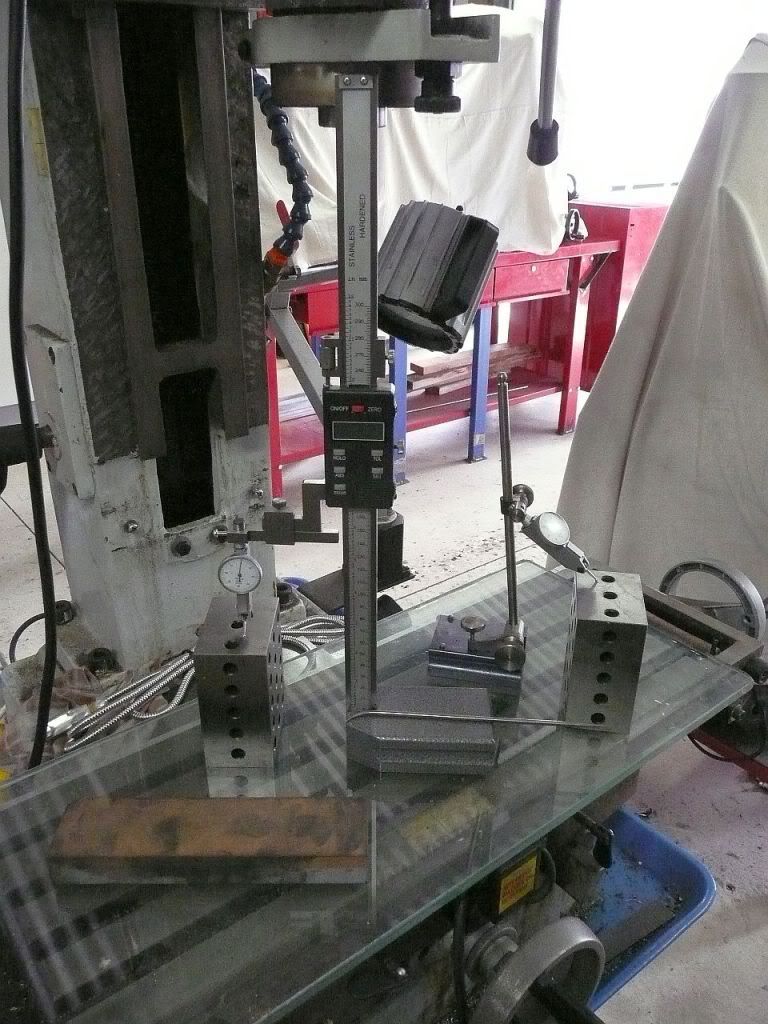
                        Here are my digital height guage and surface guage, each with a 0.01mm (~0.0004") test dial indicator in them and the TDI's resting on my 2-3-4 blocks and all of it on my 600 X 300 X 10mm float glass "surface plate" on my HF-45 mill table. Also on the glass table is a stock standard 200 X 50 X 25mm (8" X 2" x 1") fine and smooth (and very flat) oil-stone (China). The scriber - sitting on the base of the digital height guage base - belongs to the surface guage.


                        The oil-stone is rubbed over the mill table to remove any burrs or "dings" so that the table is restored to its "flat" condition for the glass plate to rest upon.

                        Both the height guage and the surface guage are just as accurate as each other for use a comparators as shown. The surface guage is much easier to use as both a comparator and for marking out than the height guage. I can put a second extension "cross" mast on the surface guage which is also easier to get into tight spaces. All of my DTI adaptors will fit both the height guage and the surface guage. I have a range of different length (8mm) masts for the surface guage.

                        I can very accurately set the DTI on the front of my surface guage to measure backward/forward motion but I can't do it with my digital height guage.

                        Generally speaking the surface guage is at least as if not more useful than the digital height guage.

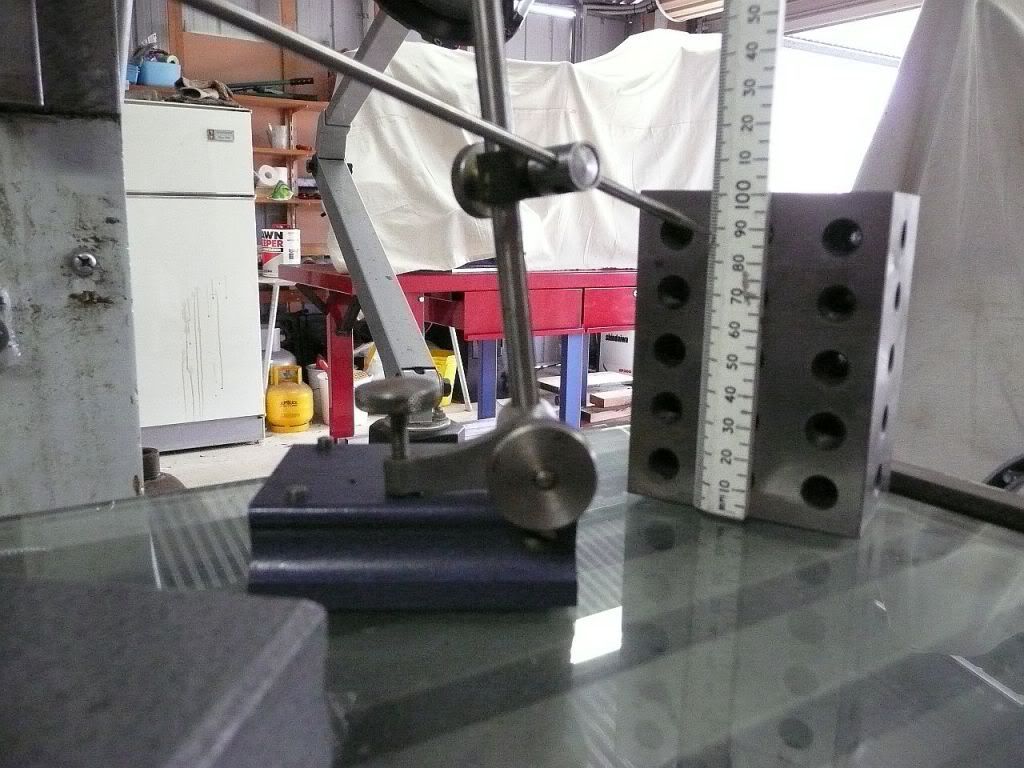
                        Here are a couple more pics of the same set-up:


                        Here is the surface guage doing what it really does do best - setting up a scriber against a rule for marking out. Sorry about the poor focus. The metric carpenters rule was used a good contrast.


                        When a comparator is used on a surface plate, the comparator should stay where it is - and NOT move over the job to be measured. The job should move under the comparator. A better result will be more assured and easier to get.

                        A comparator does not measure the height of anything really. What it does do is to compare a "master" (to which the DTI dial is "zeroed") with a job to be tested. Provided that the arm of the DTI is not more then 2 (3 or 4 at a stretch) degrees from the horizontal the "dreaded co-sine error" is pretty well insignificant.

                        Similarly, if the height guage or surface guage moves off vertical and provided that the "error" is not more than 2 degrees the "co-sine" error is insignificant.

                        Cos 1 degree = 0.99985 and so the error is 1.00000 - 0.99985 = 0.00015" (1.5 "tenths") per inch height.

                        So to minimise "cosine error", use a flat surface (surface plate, glass sheet, or machine table) as well as keeping the height differentials as short a possible and you will be on your way rejoicing.

                        If you are using slip-guages, use as small a stack and as few guages as possible and you will minimise any likely real individual and collective errors there too. But even the garden variety (Class 2) slip guages that you can buy almost anywhere are very accurate indeed for HSM purposes - they are with millionths of an inch. As previously, there are 1,000 millionths in a "thou" (0.001") and 100 of them in a "tenth" (0.0001").

                        Don't get "hung up" about surface plates, height guages or slip guages - as some do - as there is no need for it. Just be careful as they are relatively precision tools - just as a good DRO (which is accurate to "Two tenths" = 0.0002") and nobody seems too concerned about that - nor should they be.

                        Just be realistic in your needs and expectations for the job in hand, the tools you make it with - and the tools you measure it with.

                        In short, Lane is dead right.

                        Comment

                        • Forrest Addy
                          Senior Member
                          • Oct 2002
                          • 5792

                          #13
                          Yup. The punishment has to fit the crime. This is an alligory for tolerances have to suit the end requirements the parts are destined for. Those of you who poo-poo accuracies closer than you feel you need to work should bear in mind that some home shop machinists work to closer accuracies when their work requires it. The people seeking these accuracies naturally concern themselves with equipment refinements that makes it possible to attain them. This isn't a competition for status or glory. We're all working towards our respective goals.

                          Plate glass, even a thick piece of glass 1/2 or 12 mm) is thin when flatness is considered over an area. Glass is one of the stiffest of common materials but it will flex in rough as a function of its thickness to length ratio if not supported on a surface known to be flat. A mill table used as a flat substrate (a mill table in good shape is pretty flat) or a table saw (seldom very flat at all even if new) is fine if it does the job. Glass works pretty slick but there are hazards like it's easy to scratch, chip, and break. It's also too smooth to use to blue stuff on its surface.

                          I omit the glass myself when I use a machine table for general layout. I work directly off the machine table. Explanation: I hate glass where it has to be handled. I was in a car wreck when I was a sprout. I had to pick glass fragments out of my hide for years afterwards. Thus, I can't abide using plate glass as a shop tool. Break it and there's a zillion little pieces of glass everywhere.

                          Those of us who are developing skill at precision scraping have legitimate need for flatness and straighness accuracy approaching the limits of granite surface plate specifications. That's why I posted the formula so them that needs it can benefit.

                          Finally work only to the accuracy you need to ensure part function. Accuracy is generally expensive in time and money so strive for it with reason and the larger concern in mind. I've built crab pots and boat trailers, spindles and machine slides and never got hung up chasing for inappropiate accuracy in either.
                          Last edited by Forrest Addy; 07-19-2009, 05:27 AM.

                          Comment

                          • oldtiffie
                            Member
                            • Nov 1999
                            • 3963

                            #14
                            Fuzzy logic - or not?

                            Thanks Forrest.

                            Well said and timely too.

                            The reason I gave the "formulas" a working over was to put them in terms that some who may not have the math can relate to.

                            I have nothing against the use or having a surface plate at all.

                            Its just that on many occasions - as you say - the degree of accuracy may not require it.

                            A surface plate is neither a crutch nor does it guarantee accuracy of a very high order unless used skillfully and correctly.

                            I only use a surface plate when it is all that will do the job required. I would only use "blue" on a surface plate when the flatness and finish of the job achieved else-where warranted or demanded it. In my experience, it is the flat surface of last resort - not the first or anywhere else in between.

                            One point I over-looked as regards using dial test indicators and their "feeler" or "finger" or arm or stylus etc. and that is to move either the work or the indicator such that the relative motion between the work and the DTI arm is such that it is along and not across the longitudinal axis of the feeler. This is to get the best "feel" and result whilst minimising excessive lateral force which may lead to increased risk of damage to the DTI.

                            The two TDI's I showed are identical. One is used as a "working" TDI (the older one) and the other (newer one) where I can be more assured of accurate and consistent results. They are both calibrated to and accurate to 0.01mm (~0.0004").

                            I have another that is calibrated to 0.001mm ( 1 micrometer) but which is accurate to 0.003mm (~0.00012") - which I have never had occasion to use - and not very likely to either. It's there "just in case" (which is bull-$hit as I just couldn't resist it - and don't ask about the cost - even I am embarrassed!!).

                            Forrest mentioned "tolerances" which is the difference between the limits that the job requires which are in two parts which are largely inter-dependent:
                            - physical size, straightness, roundness, concentricity and parallelism etc. etc. and;

                            - surface finish: the quality or "roughness" of the finish.

                            The degree of accuracy required for measurement will exceed the degree of accuracy required to make the job.

                            Surface plates play an integral and vital part in meeting many - but not all - of these criteria.

                            Comment

                            • wierdscience
                              Senior Member
                              • Jan 2003
                              • 22088

                              #15
                              Another factor here-

                              Is your basement or garage climate controlled and kept at a balmy 68*F constantly?
                              Do you wear wool gloves when handling your measuring tolls so heat from your fingers doesn't affect accuracy?

                              Some will claim accuracy to+/- .0001" in they're home shops and I have no doubts some of those do actually achieve that.But it isn't cheap,easy or common.

                              There is a definite reason why super high tolerance work is done in shops that look like clean rooms.

                              As mentioned before-

                              .01"=$$
                              .001"=$$$
                              .0001"=$$$$
                              .00001"$$$$$$$$$$

                              Not at all linear is it?
                              I just need one more tool,just one!

                              Comment

                              Working...
                              X