My first wheel cutter

Collapse
X
 
  • Filter
  • Time
  • Show
Clear All
new posts
  • professorguy
    Junior Member
    • Jan 2017
    • 15

    My first wheel cutter

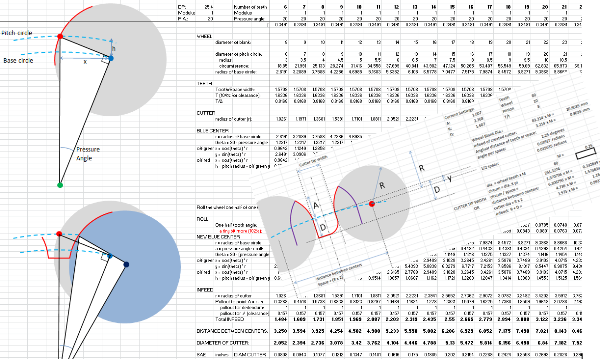
    I did geometry and trigonometry for 2 weeks. I filled more than 10 sheets of paper with diagrams and formulae, and created several spreadsheets.


    I finally came up with some firm decisions for my train. And that means after many years of planning, building my shop, and getting familiar with the tools on small projects, I have begun construction on my spring detent chronometer pocketwatch.

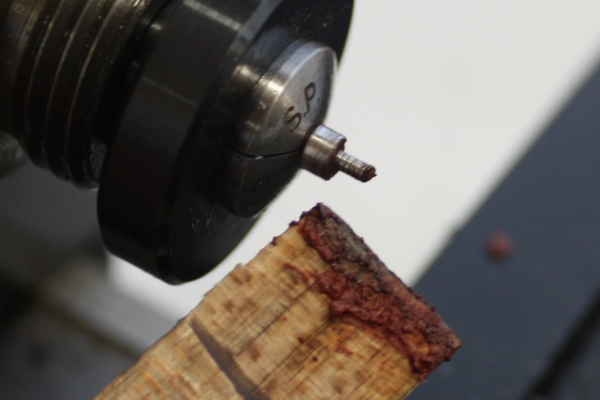
    Every journey begins with a single step. This is step one (of a million):


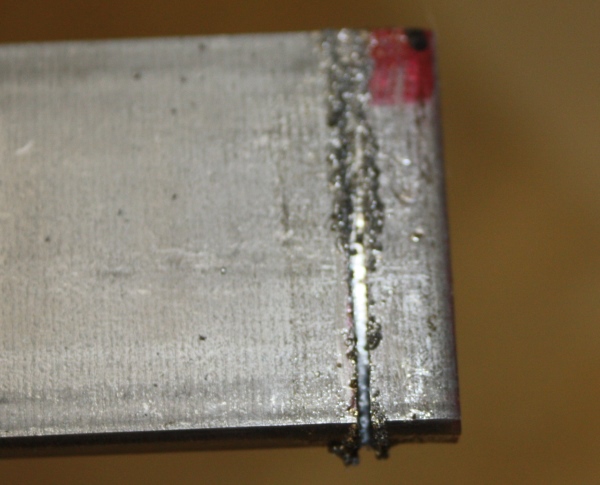
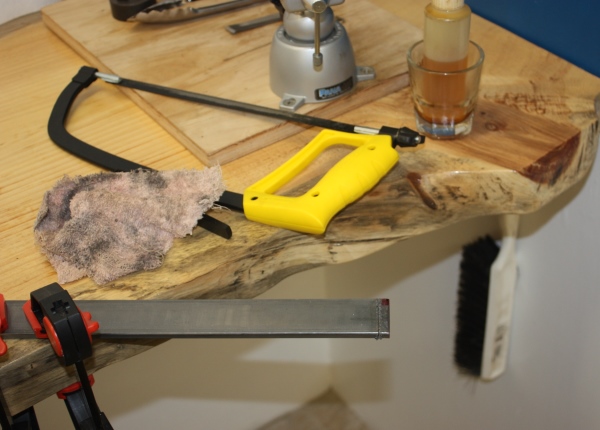
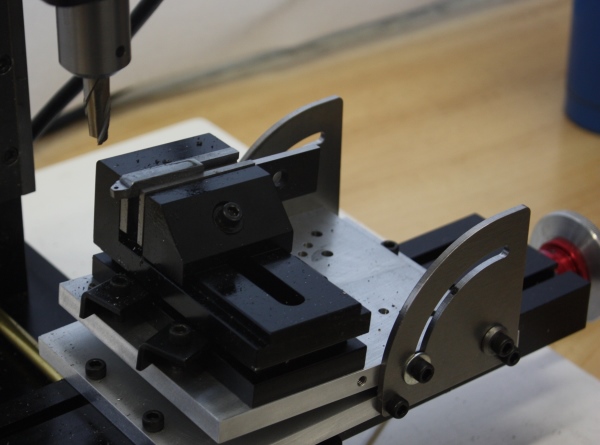
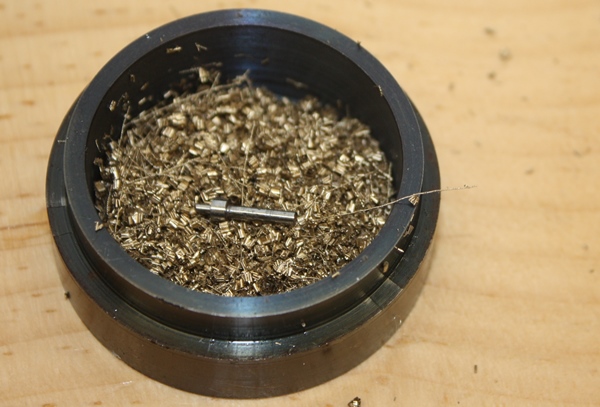
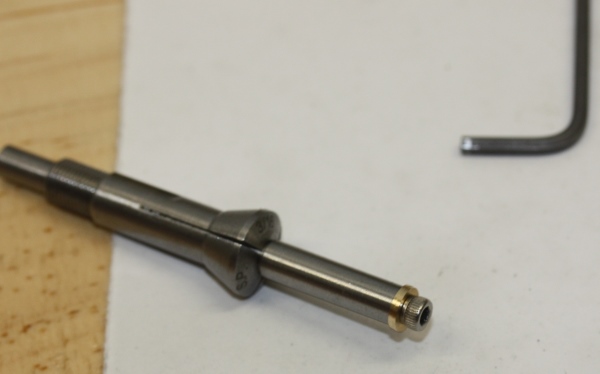
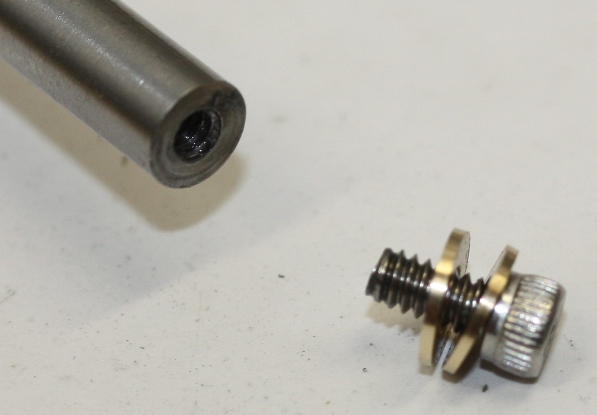
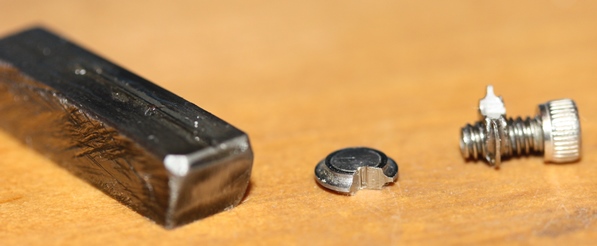
    This chunk of steel is going to be a specialized tool. I don't own a lot of expensive equipment, so even this simple cut will take some hand work. Get the hacksaw and cutting oil and get to work:


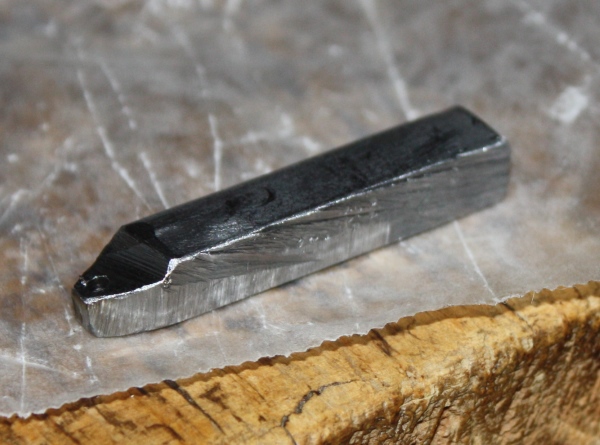
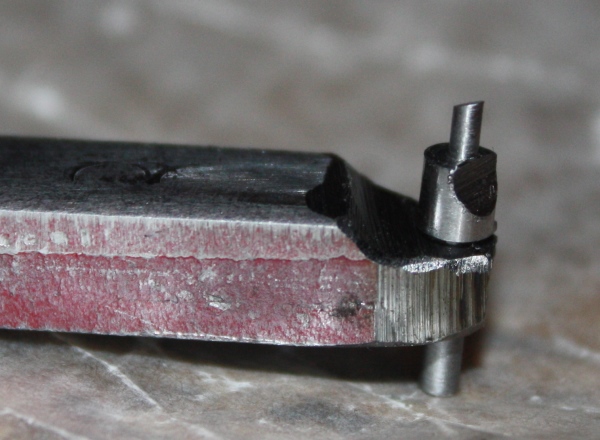
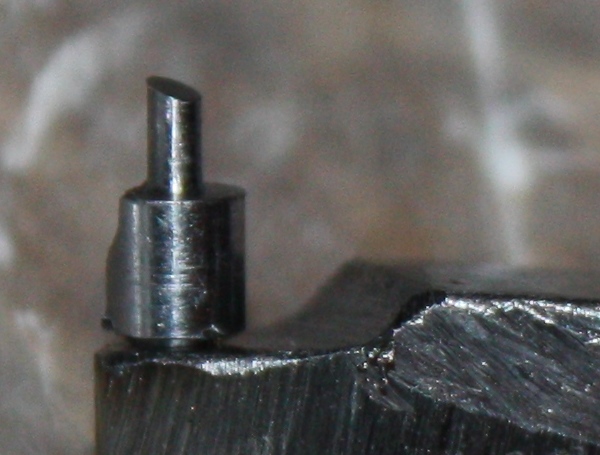
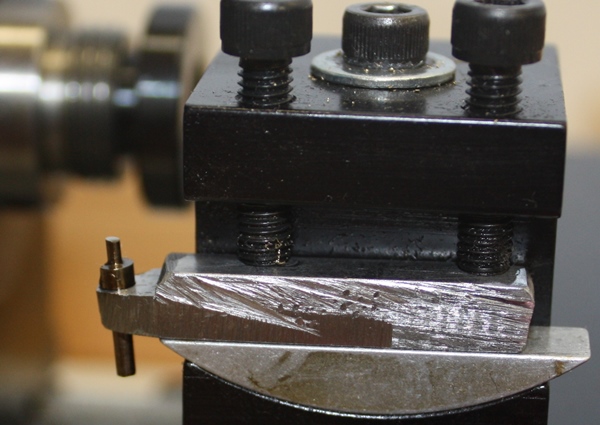
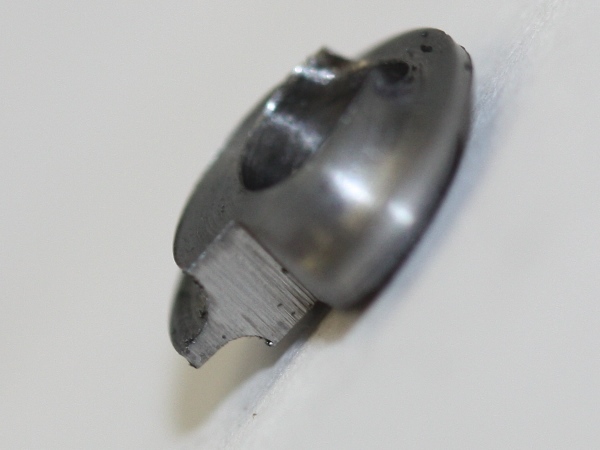
    Some rough grinding to put a 5 degree cant on the front edge, and drill a through hole also tilted 5 degrees. It is now a cutter base.

  • professorguy
    Junior Member
    • Jan 2017
    • 15

    #2
    The angle makes the tool insert hang out over the edge, giving relief to the insert as it cuts. The insert, which becomes the second tool I've made for my watch, has 5 machining steps. The radius of the top end is to within 0.01mm.


    It drops into the base, the relieved tip can now etch a radius of exactly 0.59 mm. The radius it cuts will be the inside curve of a second cutter. That cutter will cut the teeth of the center wheel of my watch.


    That's right, this is a wheel cutter-cutter. It makes a wheel cutter, which makes a wheel. Every wheel has its own cutter-cutter and cutter!

    Still a little work to do. I trimmed the shoulder from my cutter insert so it could sit flat on the stage of the cutter base. It is critical that the insert not move during the cutting process--the tolerances here are pretty damn tiny--so it must sit nice and tight.

    Also, I should clean up the base to guarantee it is flat, for that all-important support. Here the milling vice is mounted on the tilting table set at 5 degrees:


    Polish the insert, then off to the high-tech hardening station. If you look carefully, you'll see the tiny insert wrapped in iron wire ready to be dipped into the bowl of icy cold New Hampshire water. Wrapping it assures control as the red-hot piece goes into the water--it must enter vertically so as to not distort the dimensions.

    Last edited by professorguy; 01-25-2017, 07:02 PM.

    Comment

    • professorguy
      Junior Member
      • Jan 2017
      • 15

      #3
      The hardened insert must be polished before tempering. I use a piece of hard, dry ash wood from a tree that grew outside my shop, sharpened and charged with polish.


      Into the bed of brass chips, which I collected last time I had to part a piece from a 1" brass rod (the largest diameter I've ever turned). The handy steel vessel was made by hand by my son!


      You may have laughed when I called the hardening station high-tech. But when you see my tempering furnace, you will understand I wasn't being ironic.


      Yes, that's the woodstove that heats our house. Since there's a fire going from November to April, and since I'm cheap as hell, I'm going to try to temper in there even though I've never tempered steel in my life. Oh well, what could possibly go wrong? I rake out some coals and place the brass-filled steel dish on them. Then I watch. I was looking to bring it to straw, but I figured I'd take anything short of dark blue. When it looked to be darkening, I grabbed the vessel with a regular leather glove and quickly put it onto the stone hearth to cool (and quickly removed the glove). Took all of 3 minutes. Let's be generous and call it dark straw, good enough!

      Finally, the tip is polished off with 2000 grit sandpaper (the base piece itself is the polishing jig), so it is razor sharp. Here's the tool completed and mounted in the toolholder of my lathe (note the straw-ish color of the insert):

      Last edited by professorguy; 01-25-2017, 07:11 PM.

      Comment

      • professorguy
        Junior Member
        • Jan 2017
        • 15

        #4
        Next step, make a wheel cutter. That means I'll need a mandrel to hold the cutter. Those are cheap, but I'm going to do this....

        I made a mandrel. It has a stepped diameter so that it will fit into a through collet. My through collets go up to 5mm, the collets above that are stepped and can take only about 10mm of material.

        For a first try, I think it looks quite pretty:


        It takes a 40 tpi #4 allen head screw. Two soft brass washers for good grip:


        Now for another try at a cutter. First shape some steel in the lathe:


        And I get to try out my cutter-cutter. It is used to shape both sides of the symmetric cutter:

        Last edited by professorguy; 01-25-2017, 07:04 PM.

        Comment

        • professorguy
          Junior Member
          • Jan 2017
          • 15

          #5
          Hey! The cutter-cutter worked! I guess the tempering and sharpening was sufficient. It'll need an eccentric hole for mounting on my pretty mandrel. For those old time machinists, I apologize beforehand. I parted off the cutter above, then found I had absolutely no way to drill through it. The edges are cutting surfaces which cannot be dinged--so no vice. Ut-oh. OK. On to try #2:


          That huge hole accommodates the tiny #4 screw of the mandrel. This entire cutter is less than 1/4" in diameter. Some filing with a safety edged file and the cutter surface (and the shape between the teeth of the gear) becomes clear:


          Unfortunately, I didn't drill the hole deep enough. Yes, I'm very smart and I know how big a millimeter is. But I managed to blow this. Trying to clamp it to finish the hole completely destroyed this cutter. Let me stress how tiny these pieces are.

          I keep a little set of shelves in my shop. It is my museum of failures. Plenty of exhibits on display (there are a dozen screws in one of the bags):


          The failed cutters get their own shelf:


          Since I am using up only about 1 gram of steel on each attempt, I can keep this up for another few thousand tries.
          Last edited by professorguy; 01-25-2017, 07:06 PM.

          Comment

          • BCRider
            Senior Member
            • Dec 2015
            • 11596

            #6
            I think I'm going to enjoy this thread. It's a great peek into a side of metal machining that few of us will ever venture to try. The scale of the work is quite amazing.
            Chilliwack BC, Canada

            Comment

            • boslab
              Senior Member
              • Dec 2007
              • 8867

              #7
              As your somewhat stuck with a wood stove to temper, you might consider lead tin bath tempering, by adjusting the lead tin ratio it wil go molten at a definite temperature, you need to make the lead tin mix first then allow to cool, then remelt, it will become molten at a definite point, immerse the cutter in that, time is then removed and the entire part stabilises at that temperature, then quench.
              Look it up it's an old way but has proven itself.
              The initial quench in water may also be to severe, a light oil will slow the heat extraction rate a bit and keep the part away from pure cementite, into somthing like bainite or martensite too.
              Just ideas, either way well done, you are certainly determined!
              Keep it up
              Mark

              Comment

              • BCRider
                Senior Member
                • Dec 2015
                • 11596

                #8
                If I may?

                Wrapping a small item like that with iron wire is not a bad idea. It aids in holding enough heat that you're sure that the small size of the cutting tool is still hot enough for when it is quenched. But if you are making these from oil hardening steel I'd suggest that you want to do your quenching in oil. The small size of the parts you are making will already ensure a rapid quench and good hardness. And it reduces the risk of too much of a shock and possibly forming the wrong crystalline makeup as suggested above.

                The small tray with brass shavings for tempering small items is a brilliant idea. It is something I want to do as well both for aiding with tempering as well as heat bluing small screws for firearms work. I was quite taken with Clickspring's two trays for holding brass chips.

                Raking the coals out where you can rest the little tempering tray on them is a nice idea. But I'd suggest that you arrange a really good light to see the part change color. And have a set of tweezers handy so when they do turn a straw color you can get the part out of the tray before the residual heat coming up can make it go past the proper color. You can quench it if you like at that point but just lifting it out into cool air and away from the heat source should be enough to stop any additional heating.

                I know it might blow the budget 
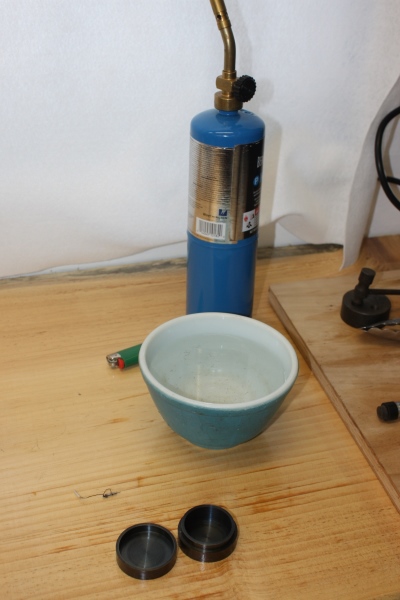
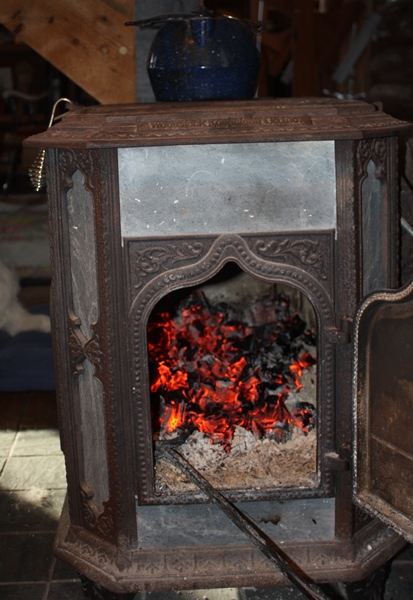
but another option for tempering with better control is a toaster oven. They all manage to get hot enough at 450F tops to bring steel to a "brown" temper. And that's actually softer than you really want. So finding the right setting to get a straw color with some consistency should not be too hard.
                Chilliwack BC, Canada

                Comment

                • 38_Cal
                  Senior Member
                  • Dec 2007
                  • 1310

                  #9
                  If you go with the molten lead-tin bath for tempering, you might look into one of the just-announced digital lead thermometers from Lyman. MSRP is $30, Midway has them for $23. Lyman's part number is 2867797, and I've got one on my shopping list now.
                  David Kaiser
                  “You can have peace. Or you can have freedom. Don't ever count on having both at once.”
                  ― Robert A. Heinlein

                  Comment

                  • john hobdeclipe
                    Senior Member
                    • Jun 2005
                    • 1722

                    #10
                    I find this to be very interesting, even though I'm not a watchist / clockist.

                    What lathe are you using? Sherline? That tool post is an interesting design.

                    Keep posting.

                    Comment

                    • Mcgyver
                      Senior Member
                      • Mar 2005
                      • 13411

                      #11
                      that looks like it worked out well....good for you
                      located in Toronto Ontario

                      Comment

                      • professorguy
                        Junior Member
                        • Jan 2017
                        • 15

                        #12
                        Originally posted by john hobdeclipe View Post
                        What lathe are you using? Sherline? That tool post is an interesting design.
                        Good eye. Yes, that's a longbed Sherline metric lathe. I also have a metric Sherline Mill. No CNC or DRO. After almost 40 years talking to computers, I've had enough! Now it's time for handwheels. It's good that the Sherline lathe does NOT have a powered threading attachment--it is manual. I dismount the engine and mount the threading gears in less than 10 minutes and I have perfect control over the stopping point with the big handwheel (I do my work under a jeweler's loupe).

                        Tempering by fireside is one of the great things in life, so I will continue to temper in the woodstove in the winter, and in a campfire in the summer. Using color for temperature control will just have to do. I am sticking to old-fashioned methods whenever possible.

                        Comment

                        Working...
                        X