If this is your first visit, be sure to
check out the FAQ by clicking the
link above. You may have to register
before you can post: click the register link above to proceed. To start viewing messages,
select the forum that you want to visit from the selection below.
Really nice work. Would you have any interest I making and selling any of these holders next time you do a "batch"? I know I can get some imports cheap but I'd like to get some usa made holders without spending 5X as much as imports. Can't hurt to ask[emoji2].
Merry Christmas all!
Galaxy S4, Slimkat
If I wasn't married I'd quit fishing
I'm flattered that you would ask that, but no--not interested. I didn't say how long it took me! Let's just say, I'm no Brian Rupnow, and leave it at that.
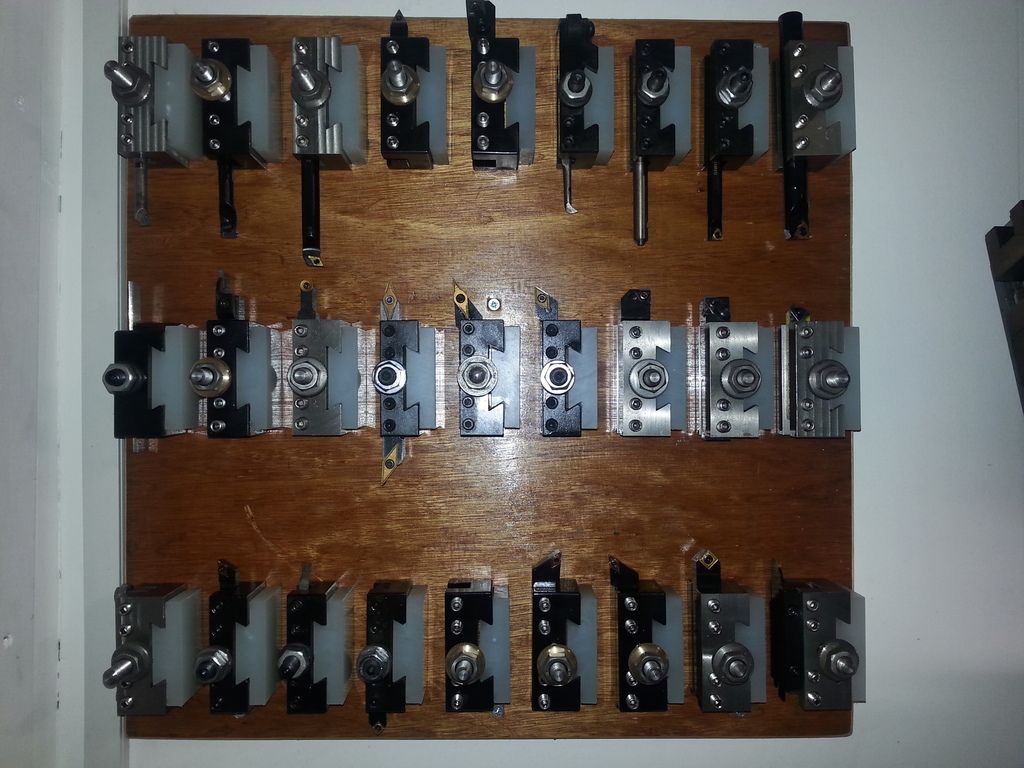
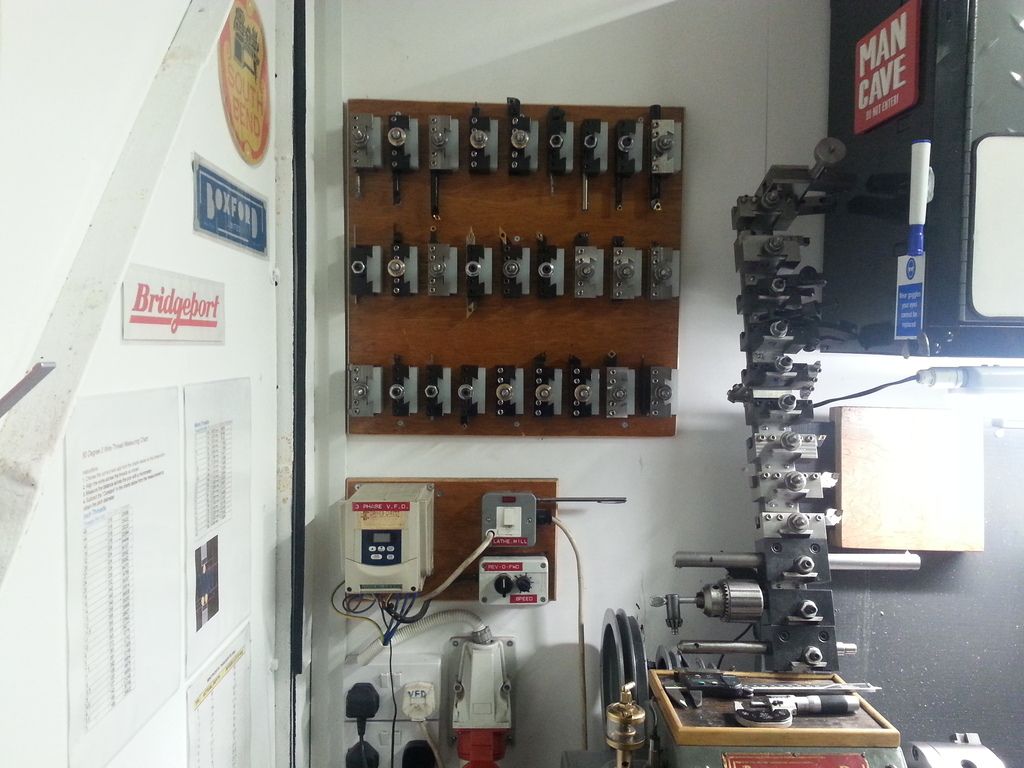
Jim2 (tool blocks) and Bob Rodgerson (adjustable angle plate) - My compliments to you both on fine examples of HSM projects. I could have used that angle plate the other day. We have one but it weighs a ton so I just figured out another way to do the job which was not as secure but thankfully worked. That tool block design makes threading a snap - "Why the hell didn't I think of that!?" (the mantra of all untalented designers) *LOL*
I have went through all 133 pages of the postings and there is a wealth of information here. Some of the items are flat incredible and kudos to their makers. Mine is much more modest though I find it quite handy.
I don't know if power tapper is the correct term for this tool and the tool certainly is not original with me. Previously I made a version of this to hold the little 1" diameter dies and I finally got around to making the tap version. I re-purposed the black anodized handle. Many years ago the handle was being discarded at work and being the pack-rat I am I hauled it home. Sadly they don't make physical stuff any more at work, just software.
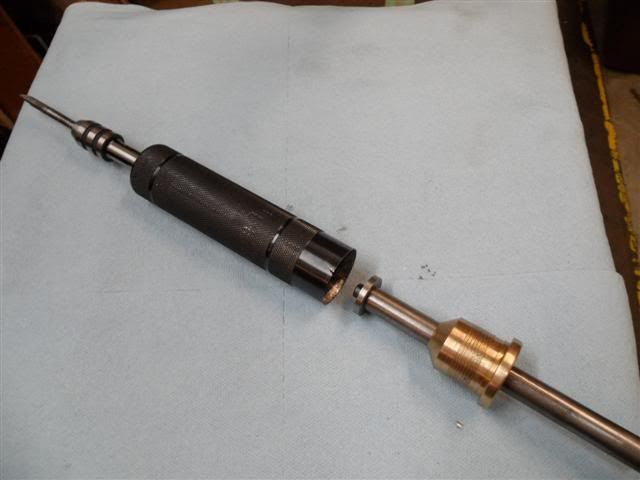
The handle played hide and seek around my shop for quite some time and recently it was discovered again. It seemed the perfect item for the power tapper. I had some cheap import tap handles so I made a steel plug, bored a hole in it and pressed the tap handle into the plug. Then I pressed the plug into the end of the black handle. The other end of the handle had internal threads which turned out to be 18 threads per inch, the same as a coarse thread for a 5/16 inch bolt.
I cheated in cutting the threads on the bronze plug that is threaded into the handle. I tapped a 5/16-18 thread in a small plug of steel (~3/8" diameter) and pressed it into the bronze part. Incidentally the bronze part was also re-purposed. It was a hydro-dynamic bearing for a 5 1/4 inch disk drive that HP used to make years ago, and its original shape was not a great deal different than the finished part in the photo.
With the threaded plug in the bronze part, I chucked the bronze plug into my little lathe (See my previous post on scratch built lathes). I threaded a 6 inch long piece of 5/16-18 all-thread into the plug and attached the other end to a bracket on the lathe carriage. Now as the part rotated in the lathe's headstock it would pull or push the carriage. I put a threading bit into the quick change tool holder and dialed in a .010" cut and turned the lathe motor on real slow and cut the threads. Stop, back out the bit, reverse the motor, then take another .010" cut and repeat until I got my threads cut. Granted the threads aren't very deep but they didn't need to be. I pressed out the threaded plug, bored and reamed the hole to 1/2" in the bronze plug. I added a keeper to the one end of a piece of 1/2 rod.
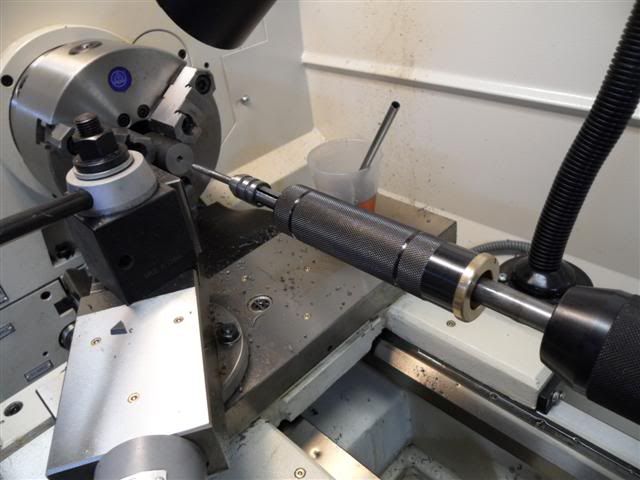
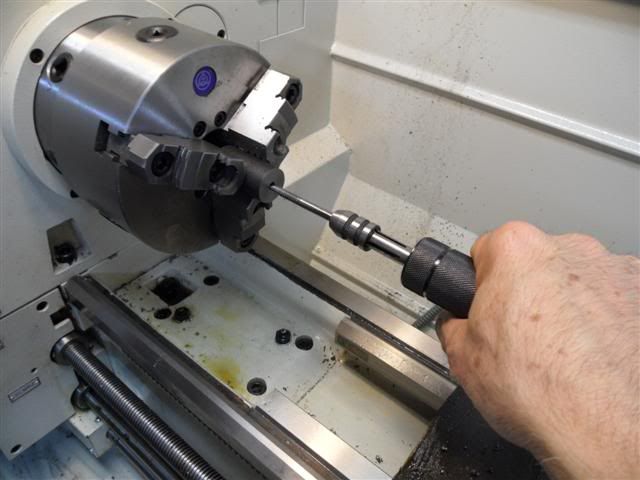
To use it, you chuck it into into the tail stock and insert a tap. 1/4" tap is about the max. Position the tail stock and start the lathe up, low speed, grab the handle and insert the tap into the hole to be threaded. You can easily feel if the tap is binding or working too hard and just let go of the handle. Reverse the lathe to clean things out and repeat.
I really like this if I were to do this this is what I would do
Happy Hunting
archie
This is a steady rest used on a surface grinder to support smaller items (pins, drills, etc.) being ground. It minimizes vibration and bouncing quite efficiently.
It's a ball bearing spindle set precisely horizontal over the base. The part to be ground is attached to the front and rotated on the spindle of the fixture, while the grinding wheel of the surface grinder grinds the part.

 Tweet
Tweet

.png)


Comment