.png)

 Tweet
Tweet
If you've ever changed a thermostat on your car, you know there's usually a thermostat housing, the thermostat and a gasket/o-ring to seal it all up. Big truck thermostats have the same parts but also have another seal (they look like an oil seal) to deal with. Most of the time it's not an issue as that extra seal is part of the housing and can be dealt with on the bench. The Volvo D12 engine in this case... Not an easy thing.
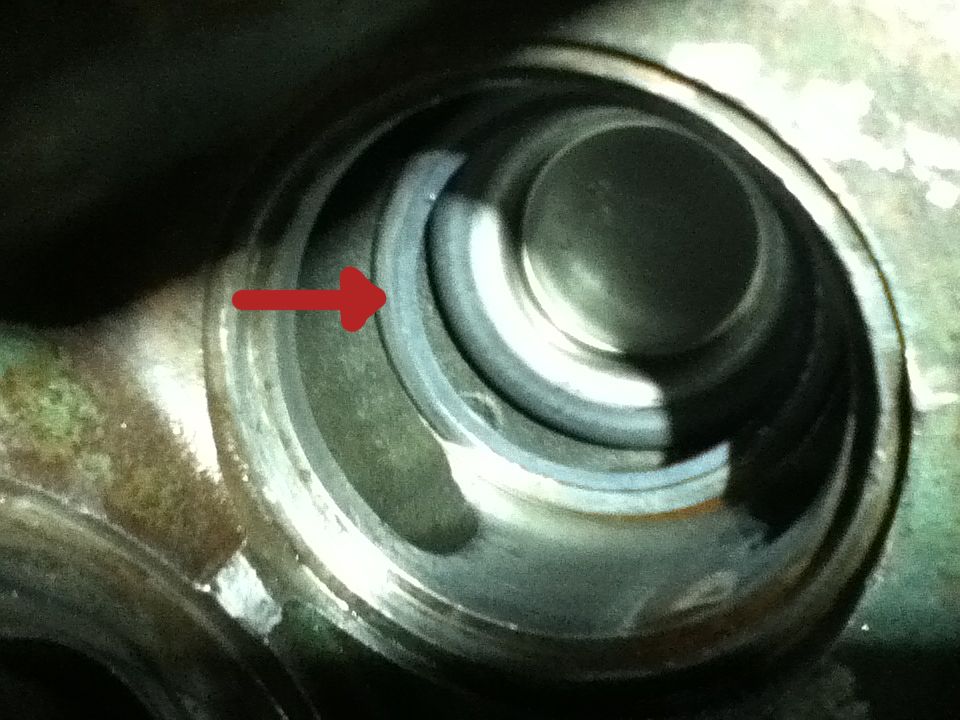
This particular thermostat seal requires, according to the service manual, a special tool. This is nothing new, but if a shop actually had all the "special tools" that service manuals called for, a separate building would be required to store those tools. So, as I'm sure most of you are aware, shop-made tools and work-arounds are usually the order of the day. This thermostat seal that was giving my mechanic fits is a perfect example. The truck had to be rolling by morning. No excuses. Arrow points to the seal. This is on the passenger side of the engine looking forward.
The seal had to be installed about 1 5/8" down inside the thermostat housing which is part of the cylinder head. Not a big deal, pick a socket of the appropriate size, apply a few whacks with a hammer and you're done. Except on this engine. The exhaust manifold was in the way. Not a chance in Hades that this seal was going to be installed via the hammer and socket method. Believe me, I tried. I wasn't going to pull the exhaust manifold either. After staring at it and letting loose with a string of profanity, I noticed a spot on the end of the exhaust manifold that was relatively perpendicular to the axis this darn seal had to move. Time to make a tool. I would have gone right to the lathe but I still haven't been able to talk the boss into getting one for the shop. I also couldn't make this tool at home as there was a "next day" deadline to be met. So, as Old Tony is wont to say "A few licks on the grinder and..." a 5/8" bolt, nut and washer are transformed into a special tool.
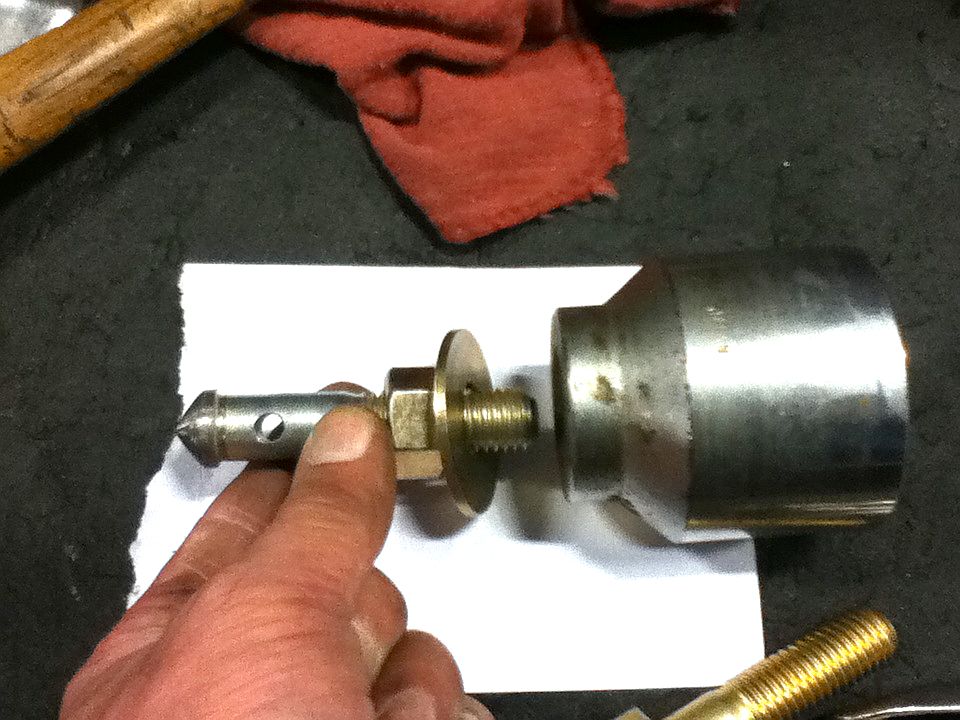
The bolt head was ground to a point to deal with the not-so-perpendicular exhaust manifold and a hole was cross drilled for an anti-rotation (1/4" leveling valve rod) device. In conjunction with the appropriately sized socket, this is the setup.
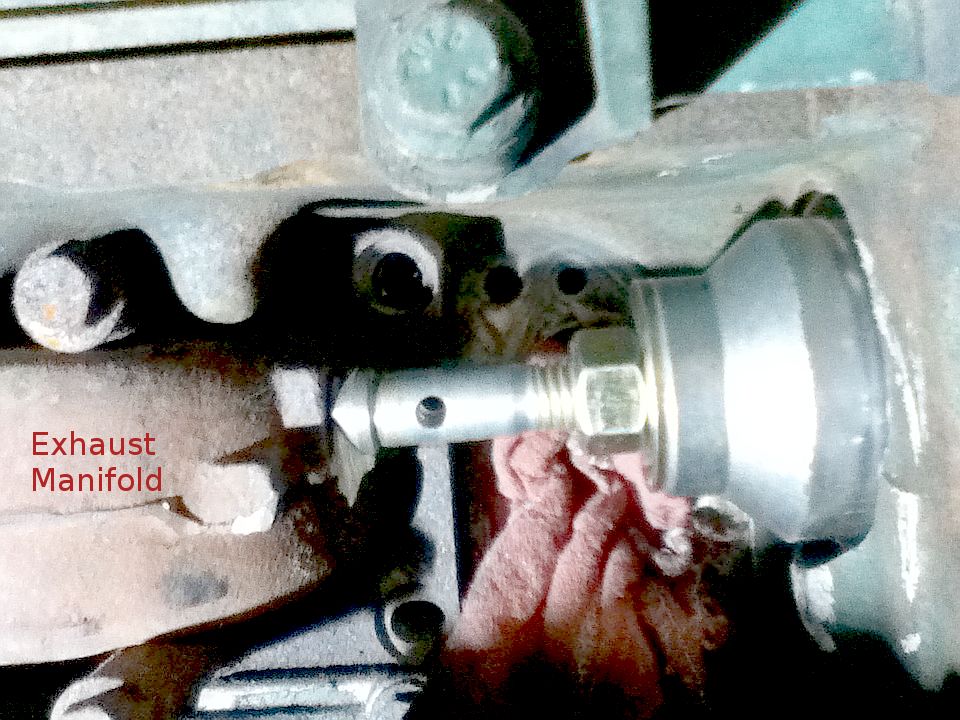
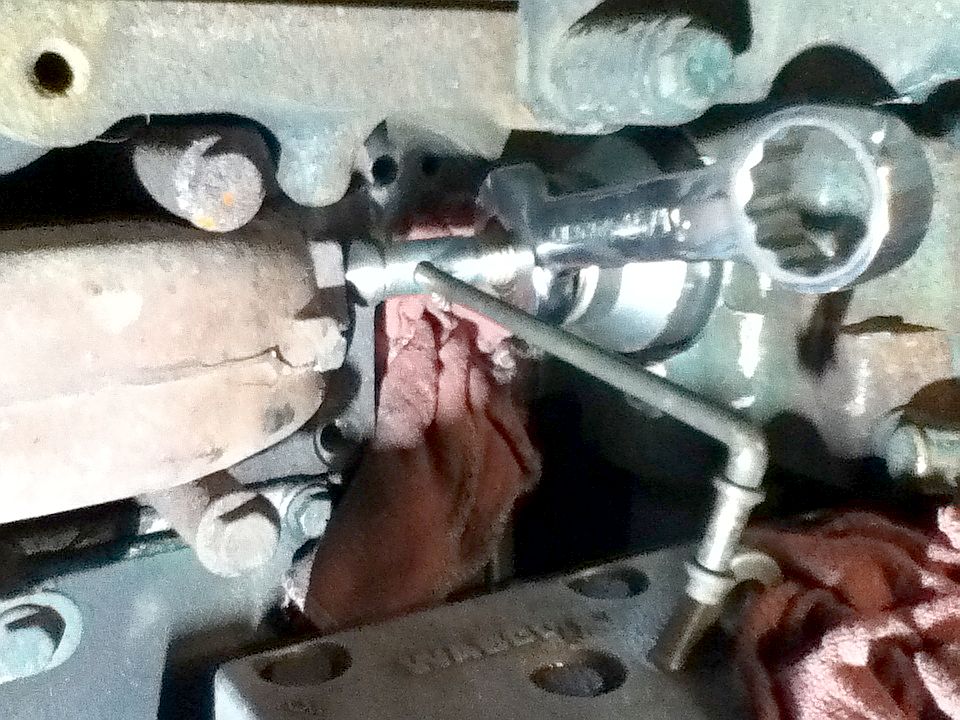
I put the seal in place as square as I could by feel, held the bolt from rotating with the 1/4" rod and started turning the nut with a stubby 15/16" wrench.
It worked like a charm. However, this thermostat housing did not have a lip to stop the seal. Frequent removal of the tool was required to ensure the seal wasn't driven too far. The result? Well, the first photo is post-installation. I took measurements along the way and will be making another installation tool that won't look so shady. Having had my basement machine shop for a couple of years has improved my performance at the day job. One eye sees things as a mechanic and the other eye sees things as a machinist. The things I've seen you people build, especially in the shop made tools thread, have definitely made me realize many problems can easily be solved. Now if I could just get a lathe at work...
This particular thermostat seal requires, according to the service manual, a special tool. This is nothing new, but if a shop actually had all the "special tools" that service manuals called for, a separate building would be required to store those tools. So, as I'm sure most of you are aware, shop-made tools and work-arounds are usually the order of the day. This thermostat seal that was giving my mechanic fits is a perfect example. The truck had to be rolling by morning. No excuses. Arrow points to the seal. This is on the passenger side of the engine looking forward.

The seal had to be installed about 1 5/8" down inside the thermostat housing which is part of the cylinder head. Not a big deal, pick a socket of the appropriate size, apply a few whacks with a hammer and you're done. Except on this engine. The exhaust manifold was in the way. Not a chance in Hades that this seal was going to be installed via the hammer and socket method. Believe me, I tried. I wasn't going to pull the exhaust manifold either. After staring at it and letting loose with a string of profanity, I noticed a spot on the end of the exhaust manifold that was relatively perpendicular to the axis this darn seal had to move. Time to make a tool. I would have gone right to the lathe but I still haven't been able to talk the boss into getting one for the shop. I also couldn't make this tool at home as there was a "next day" deadline to be met. So, as Old Tony is wont to say "A few licks on the grinder and..." a 5/8" bolt, nut and washer are transformed into a special tool.

The bolt head was ground to a point to deal with the not-so-perpendicular exhaust manifold and a hole was cross drilled for an anti-rotation (1/4" leveling valve rod) device. In conjunction with the appropriately sized socket, this is the setup.

I put the seal in place as square as I could by feel, held the bolt from rotating with the 1/4" rod and started turning the nut with a stubby 15/16" wrench.

It worked like a charm. However, this thermostat housing did not have a lip to stop the seal. Frequent removal of the tool was required to ensure the seal wasn't driven too far. The result? Well, the first photo is post-installation. I took measurements along the way and will be making another installation tool that won't look so shady. Having had my basement machine shop for a couple of years has improved my performance at the day job. One eye sees things as a mechanic and the other eye sees things as a machinist. The things I've seen you people build, especially in the shop made tools thread, have definitely made me realize many problems can easily be solved. Now if I could just get a lathe at work...


 As mentioned, it probably won't get used again. Just having the idea in my head and the knowledge that it will work is good enough for me.
Comment